Commercial · August 16, 2026 · 6 min read
Tying New Framed Walls Into an Existing Suspended Ceiling Grid: What We Learned on a Commercial Build-Out
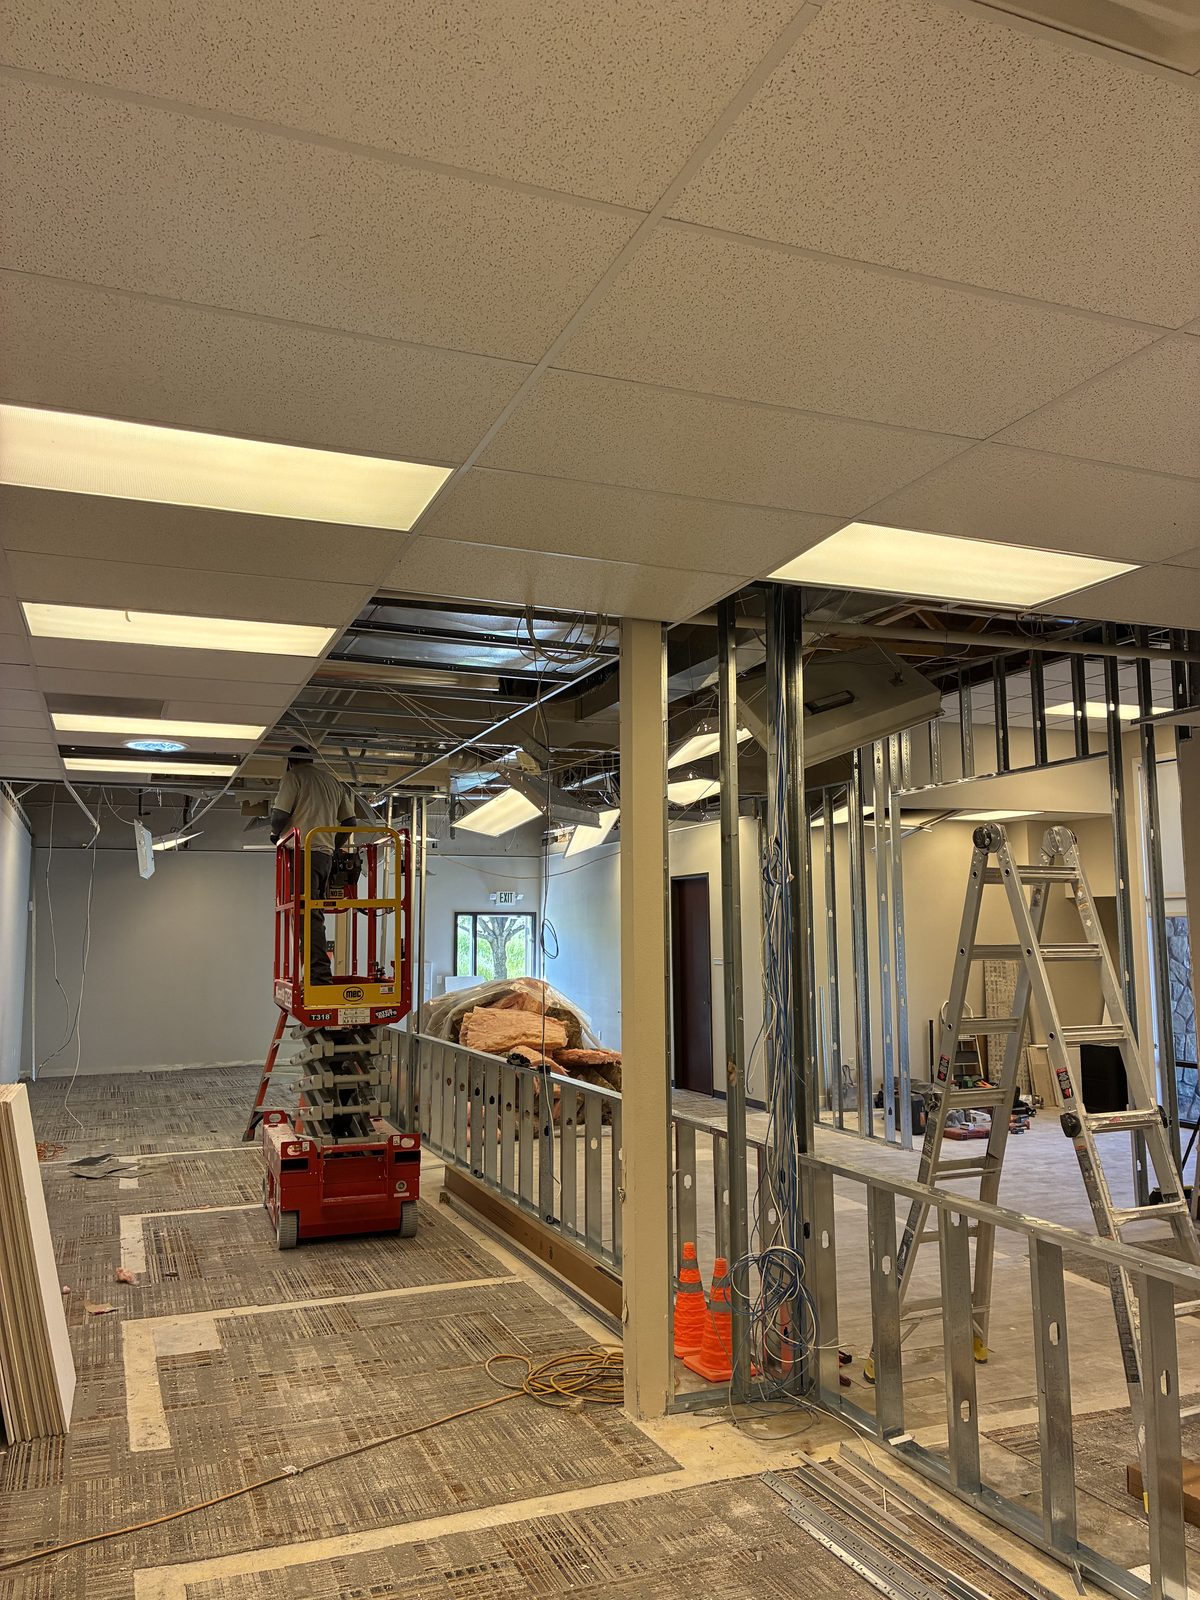
Tying new interior walls into an existing suspended (drop) ceiling grid means demoing only the grid sections directly above the new wall lines, framing and rough-in first, then rehanging and patching the surrounding grid to match — reusing tile and tee stock wherever the modules line up. Get the wall layout locked before the grid comes down, or you'll spend labor twice.
We ran this exact sequence on a recent commercial tenant improvement in the Treasure Valley — new interior office walls, data infrastructure, and flooring going into an occupied building with an existing suspended grid ceiling staying largely in place. Below is the process, in the order we'd run it again, for other trades bidding or subbing similar scope.
Why does the ceiling grid matter before you frame anything?
Suspended grid ceilings are laid out on a fixed module (most commonly 2'x4' or 2'x2'), and that module rarely aligns with where a client wants a new wall. Two problems show up immediately:
- New wall top track has to land on a main tee or cross tee, not float under an open tile — otherwise you're cutting and re-supporting grid pieces after the fact.
- Any wall that runs parallel to the grid's long axis but off-module forces you to re-square a chunk of ceiling, not just patch a line.
On our job, the existing grid covered two large field areas — one roughly 25' x 25', one roughly 15' x 26' — that both needed partial removal to get new wall track and a data pole into place. We pulled the grid tile and tee only in the direct path of new construction, boxed and labeled the reusable tee and tile by size, and left the rest of the field ceiling untouched and supported.
What's the right sequence: demo, frame, rough-in, drywall, then ceiling?
Here's the order that avoided rework on this project:
- Selective demo — pull grid tile/tee only where new walls, headers, or the data pole pass through. Demo existing partition walls and any cabinetry being removed at the same time so the space is clear for layout.
- Snap and verify wall layout against the grid module — before framing, dry-lay top track and confirm it lands on tee lines, not mid-tile.
- Frame walls — in our case a 62 LF, 36"-tall half-wall down the center of the building with a data pole in it, plus a 10' x 15' full-height wall with a 14'-tall section at the entry (the taller section needs a structural look at header and blocking — don't price it off standard 8' framing rates).
- Rough-in electrical and data before the grid goes back — with the ceiling open, this is the only point where running cable to a data pole or overhead drops is fast. On this job that meant powering roughly 20 desk stations from the new half-wall.
- Drywall, tape, texture, and paint the new walls — standard sequence, but stage it so ceiling rehang doesn't happen until wall finishes are done and dust-generating work is behind you.
- Rehang the grid — reinstall main tee and cross tee first, square to the field, then reset tile. Reuse original tile wherever the module matches; new tile only where cuts or damage require it.
- Flooring last — install new flooring and cove base once all overhead and wall work is complete, so grid dust and wall texture debris aren't landing on new floor material.
What actually eats the budget on this kind of scope?
The line items that are easy to underprice on a ceiling-tie-in job:
| Scope | Why it runs over a flat-rate bid |
|---|---|
| Grid rehang | Squaring a partial field back to true, matching existing tee spacing, and sourcing matching tile takes longer than a fresh grid install — you're working around what's already there, not building from scratch. |
| Tall wall sections | Anything over 8' (like an entry feature wall) needs a structural look — longer studs, possible header, extra blocking — that standard per-LF framing rates don't cover. |
| Data infrastructure in a half-wall | A center data pole and in-wall low-voltage routing adds conduit, boxes, and coordination time that a plain partition wall doesn't need. |
| Hidden ceiling conditions | Old grid systems often have mismatched tee profiles or non-standard tile sizes from prior renovations — you don't find this until the grid is open. |
Rule of thumb from this job: if the ceiling grid is more than a few years old or has clearly been modified before, budget rehang labor closer to new-install rates, not "just put it back" rates.
FAQ
Can you always reuse the existing ceiling tile after a wall tie-in? Only where the module still lines up and the tile isn't damaged or discolored next to newer areas. Expect to replace tile at the seams between old and new work even if the grid itself is reused.
Does the ceiling grid need to come down before you can frame the wall below it? Only in the direct footprint of the new wall and any header. You don't need to drop the whole field — selective removal keeps the rest of the ceiling supported and avoids re-hanging tile you didn't need to touch.
Who's responsible for the ceiling grid tie-in — the framer, the drywaller, or a separate ceiling sub? On this job it fell under our scope as the framing/finish trade, coordinated with the GC. On larger commercial jobs it's sometimes a dedicated acoustic ceiling sub — confirm scope boundaries in the bid before pricing grid rehang, since it's easy for it to fall into a gap between trades.
How long does a partial grid tie-in add to a commercial build-out timeline? On a project this size — new interior walls, data rough-in, and roughly 1,750 sq ft of flooring — the ceiling and wall sequence added about a week of the overall 6–8 week schedule, mostly in rehang and punch-list matching.